Oops! Something went wrong while submitting the form.
Introduction
Every optimisation you run and every decision you defend will lean on the data you set up here. A clean Google Tag Manager (GTM) + Google Analytics 4 (GA4) installation means you can add events, switch consent modes, or debug campaigns without begging developers for deploy time. Follow the steps below exactly; I’ll note where to drop your screenshots so the rest of the team can replicate your work later.
Navigate to tagmanager.google.com → Create account.
Enter the company name and Container name (use your root domain).
Choose Target platform → Web and click Create.
4. Accept the terms; Google shows two code snippets.
5. Copy both the snippets
Add GTM snippets to Webflow
Follow the two–snippet rule: the head script lives once in global Site Settings; the body noscript lives on every page via a reusable Component.
1 Paste the head snippet in Site Settings
In Webflow, open Site settings → Custom Code → Head.
Copy the entire <script> snippet from the Tag Manager modal.
Paste it into the Head field.
Click Save and Publish the site.
2 Add the body snippet with a Code Embed element
Open any page in the Webflow Designer.
Drag a Code Embed element into the very top of the page tree, just inside the <body>.
Copy the <noscript> snippet from Tag Manager.
Paste it into the Code Embed editor and click Save & Close.
3 Turn the Code Embed into a reusable Component
Right-click the Code Embed element → Create Component.
Name it GTM Body Snippet.
The Component now appears in the Components panel; drag it onto every template or static page that should fire GTM.
If you ever need to update the <noscript> (e.g., container change), edit the Component once Webflow propagates the change to every page.
Paste this component on every page!
4 Publish and verify
Publish the site again.
View source on the live page and search for GTM-XXXX you should see the head script near the top and the noscript immediately after the opening <body>.
Proceed to Preview mode in GTM to confirm the tag fires.
[PRINT SCREEN: Browser View-Source showing both snippets in their correct locations]
By splitting the two snippets this way and turning the body code into a Component you guarantee the noscript loads everywhere and future edits take seconds, not hours.
Set up GA4
In analytics.google.com choose Admin → Create property.
Name it “<Site> GA4”, set the correct currency + time-zone, click Next → Create.
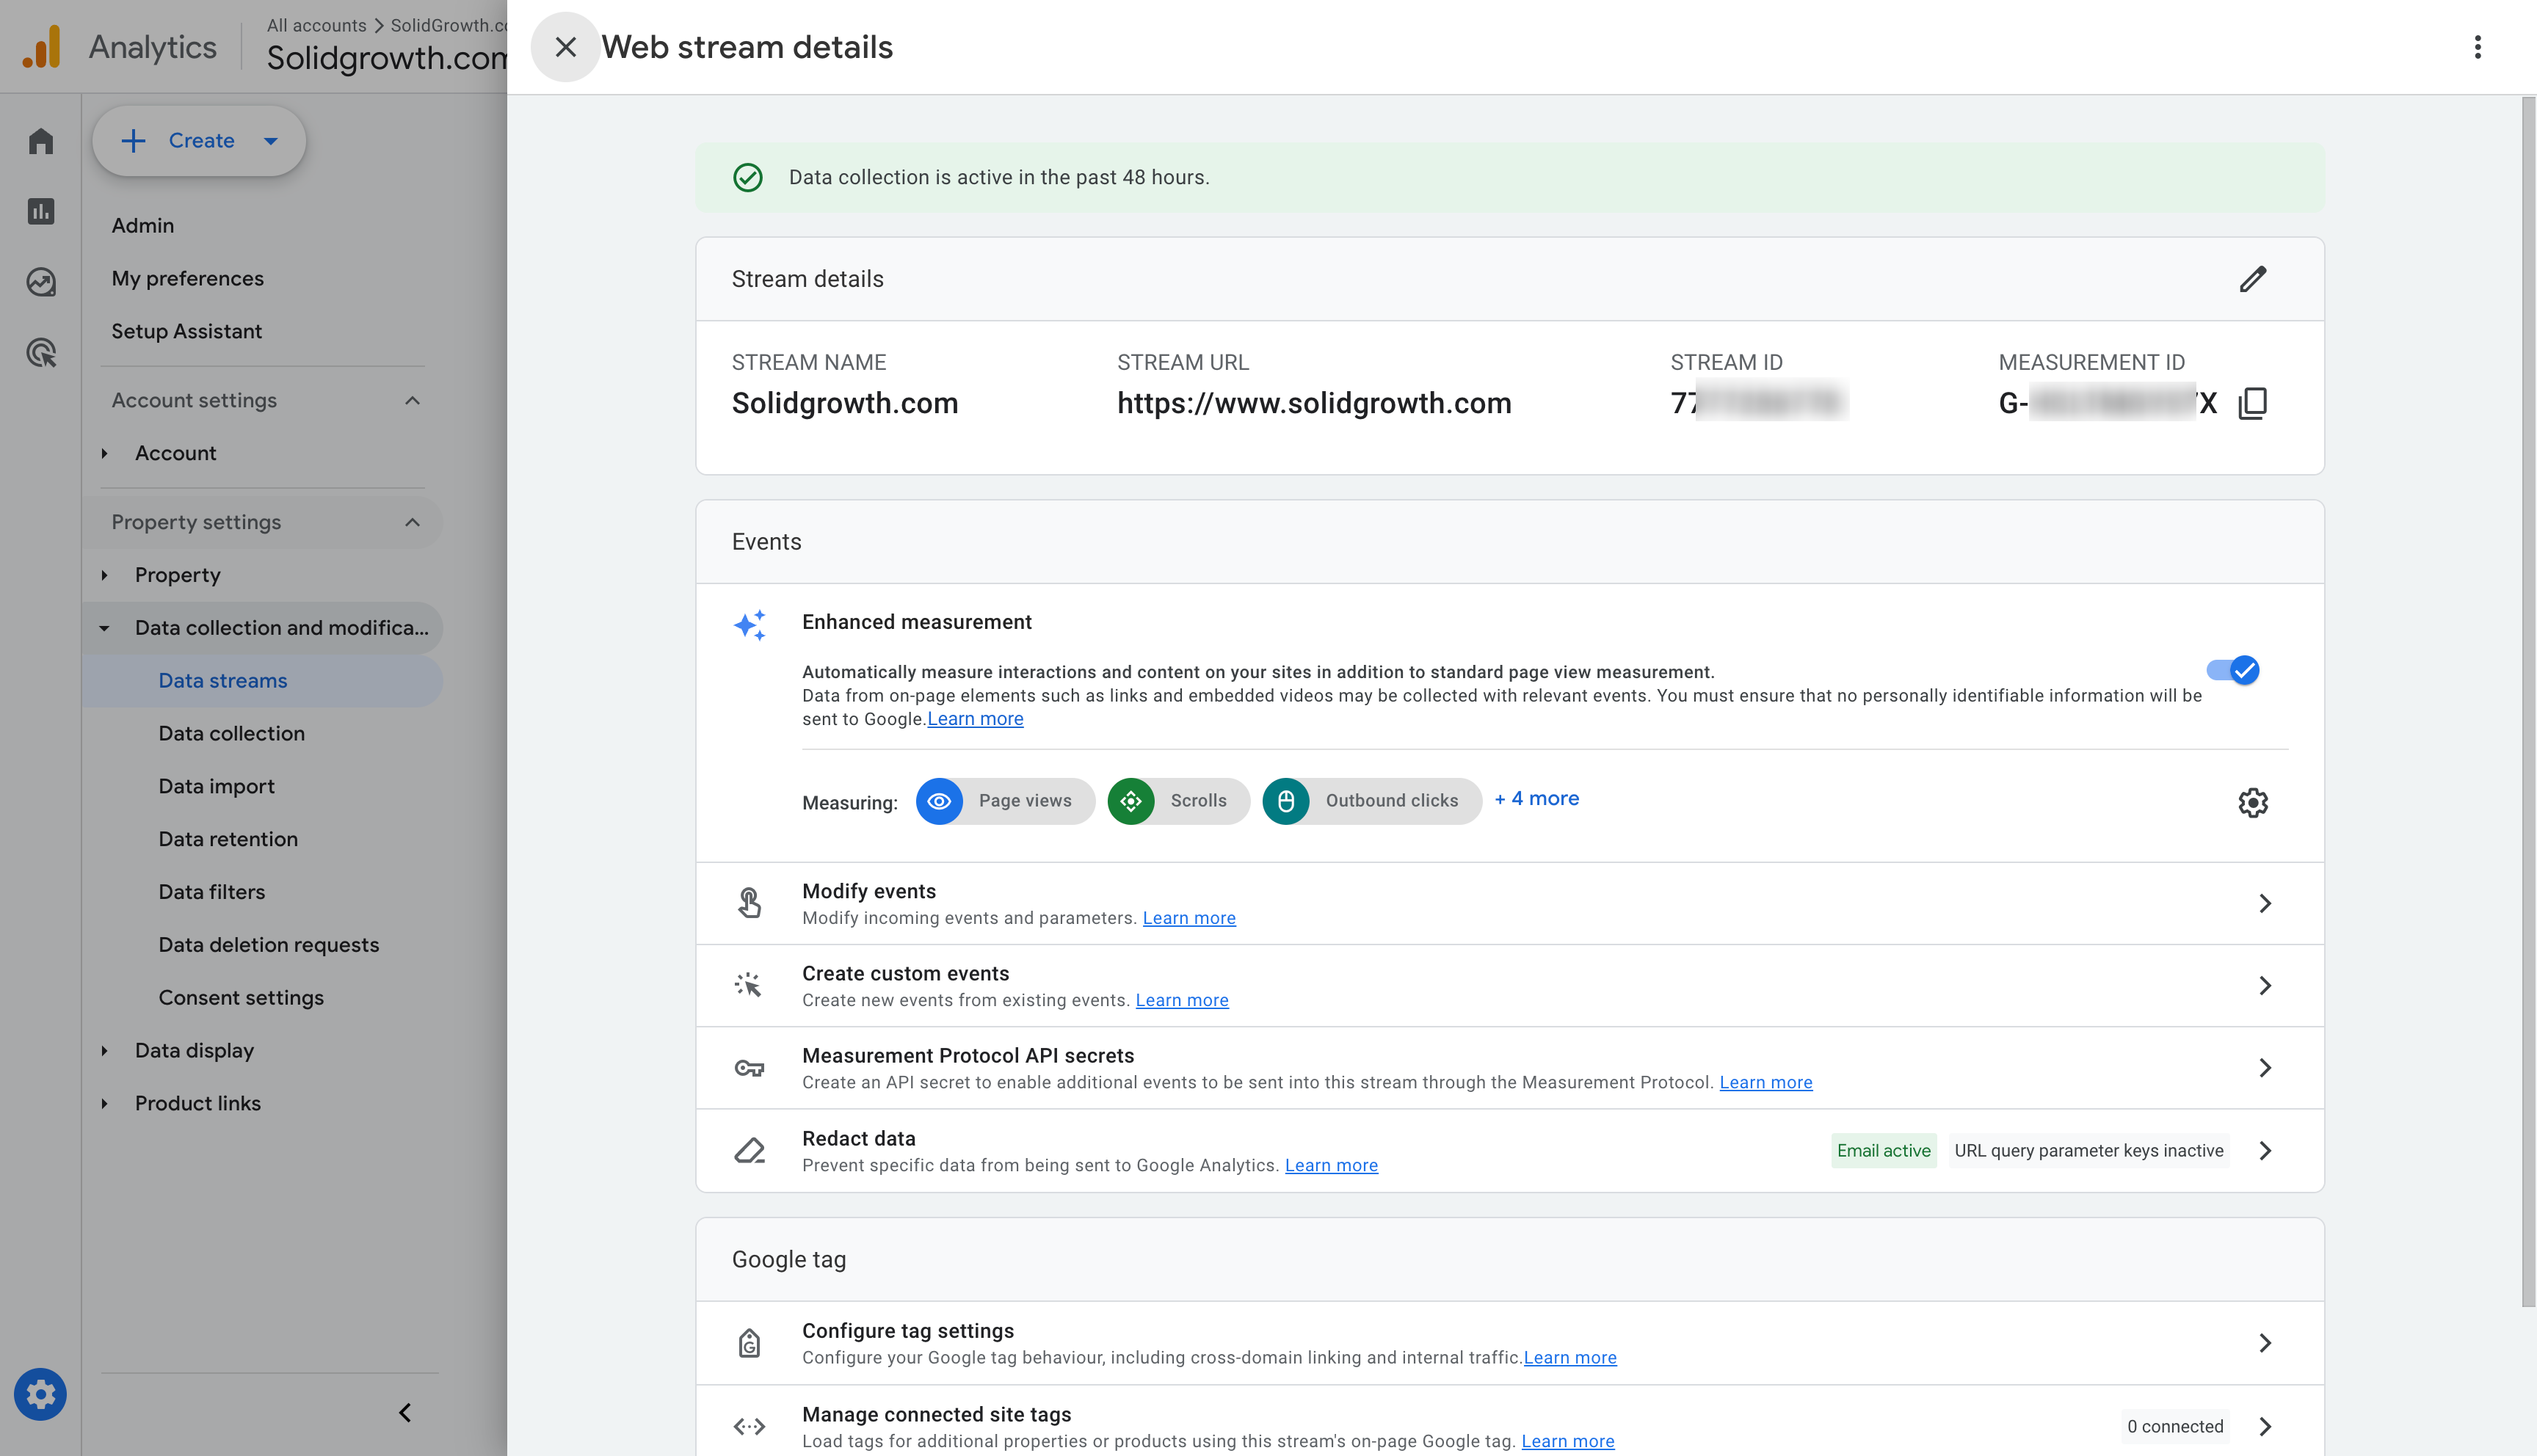
On the Data streams screen choose Web, enter your domain, click Create stream.
Copy the Measurement ID (G-XXXXXXX) on the right.
Connect GA4 in GTM
Back in GTM → click Tags → New.
Name it GA4 – Configuration.
Tag type: Google Analytics: GA4 Configuration.
Paste the Measurement ID.
Leave Enhanced measurement ON by default (scrolls, outbound link, etc.).
Under Fields to set add:
analytics_storage = granted
ad_storage = denied (update later when consent banner is live).
Trigger: All Pages. Click Save.
Launch GTM Preview
In GTM click Preview → enter site URL → Connect.
A new tab opens with the Tag Assistant debugger.
Confirm events in GA4 DebugView
In GA4 → Admin → DebugView (or Configure → DebugView in left nav).
Refresh your site tab.
Look for page_view event from your device within 10 seconds.
If the event appears, both snippets and the configuration tag are working. If not, check ad-blockers, script blockers, or copy/paste errors.
Publish and verify real-time data
Publish GTM workspace
Click Submit → Version name “Initial GA4 install” → Publish.
Share the version link in Slack for audit trail.
Verify in GA4 Realtime
GA4 → Reports → Realtime.
Open an incognito window, visit three pages.
You should see active users and top event = page_view.
[PRINT SCREEN: GA4 Realtime report showing 1 active user from your location]
Allow up to 24 hours for standard reports (Engagement, Acquisition) to populate.
Publish GTM workspace
Click Submit → Version name “Initial GA4 install” → Publish.
Share the version link in Slack for audit trail.
Verify in GA4 Realtime
GA4 → Reports → Realtime.
Open an incognito window, visit three pages.
You should see active users and top event = page_view.
Allow up to 24 hours for standard reports (Engagement, Acquisition) to populate.
Conclusion
A clean install of Tag Manager and GA4 follows four steps: add the GTM snippets, create the GA4 property, test every page in preview mode and publish only after verification. Completing those steps today gives you a single source of truth and ends guess-work about site traffic.
I run the same process for every new project because it prevents tedious repairs later. Your analytics now show live page views; the next task is to decide which actions demos, trials, deals belong alongside them. That decision turns raw hits into growth insight and will be the focus of the following chapter.
Capture specific user actions in your product or website to understand behaviour patterns and measure whether changes improve outcomes or create friction.
By clicking “Accept All Cookies”, you agree to the storing of cookies on your device to enhance site navigation, analyze site usage, and assist in our marketing efforts. View our Privacy Policy for more information.


.png)
![[PRINT SCREEN: Webflow › Site Settings › Custom Code panel showing <script> pasted in Head]](https://cdn.prod.website-files.com/65dcbaba5bc2ba10de80f3c9/681c9799d8a91fe3a79e5142_6814c760b92e2cf17692b1f5_SolidGrowth-com-Custom-code-Webflow-05-02-2025_03_23_PM.png)


.png)

